
Instructions for Use
Download PDFOverview
Tiny Air is a validated, fully automated pre-cleaning system for surgical instruments. The system's cold-water cycle removes contaminants prior to reprocessing in a washer disinfector. The Tiny Air system is intended to replace manual and/or ultrasonic pre-cleaning.
Regulatory Compliance
The V2.1 Tiny Air machine is a CE marked Class 1 Medical Device certified for pre-cleaning Surgical Instruments in a Sterile Services washroom or at point of use (Operating Theatre), prior to processing through a Washer / Disinfector.
Safe Working Procedure: Preparation
Standard DIN Basket
The wash cabinet carriage is designed to hold a 480mm × 250mm × 50mm Standard DIN basket.
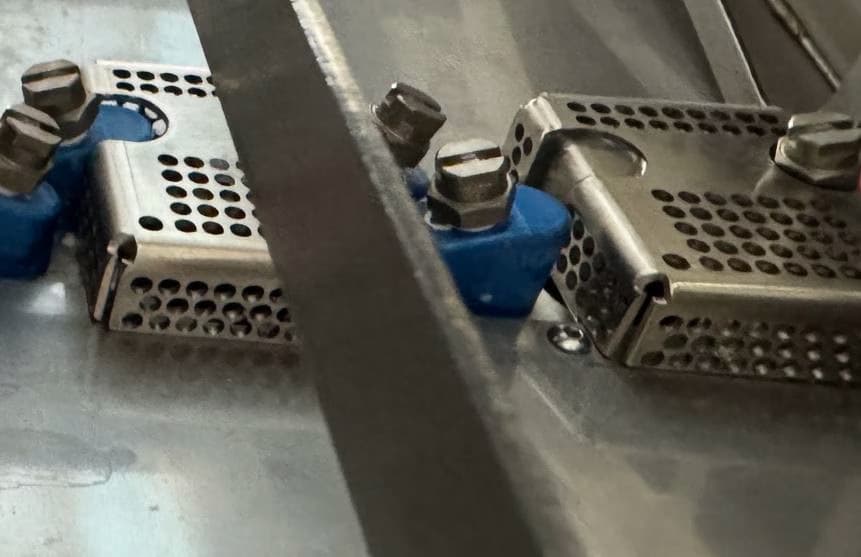
Carriage
The carriage can be used with other baskets including several bespoke graphics trays. The lip at each end of the carriage holds the basket in position.
Carriage Magnets
The carriage drive contains strong magnets. In normal use these are within the wash cabinet and pose no risk.
⚠ WARNING: Do not remove or handle the carriage if you have a pacemaker or ICD.
Instruments
The Tiny Air system is designed to pre-clean surgical instruments defined as suitable for pre-cleaning in the manufacturers IFU's, including surgical stainless steel (S5316), plastic instruments, and sets that are currently pre-cleaned manually e.g. Orthopaedic or Maternity sets.
The Tiny Air should not be used to pre-clean delicate instruments that would not normally be manually pre-cleaned, for example Ophthalmic devices.
The Tiny Air system is recommended for and compliant with installation at point of instrument use.
Basket and Lid
A wire mesh lid or similar should be fitted to the basket during the cleaning cycle. Where devices are very small and could fall through the wire basket, a jewellery type basket should be used and placed into the standard DIN basket for processing.
Loading the Machine
Doors
The doors open and close automatically. If the doors are obstructed, they will remain stationary and click loudly. If the doors are clicking, remove the obstruction and the doors will reset automatically.
To remove a trapped obstruction, the doors can be physically pushed open or shut without damaging them. The doors will be automatically open when the machine is ready to use. The doors should not be manually operated unless there is an issue.
If the machine is not in a ready state, use the following procedure:
- Press the emergency stop button.
- Turn the e-stop button clockwise to release it.
- Select 'Reset E-Stop' on the touch screen.
This procedure will reset the machine for use.
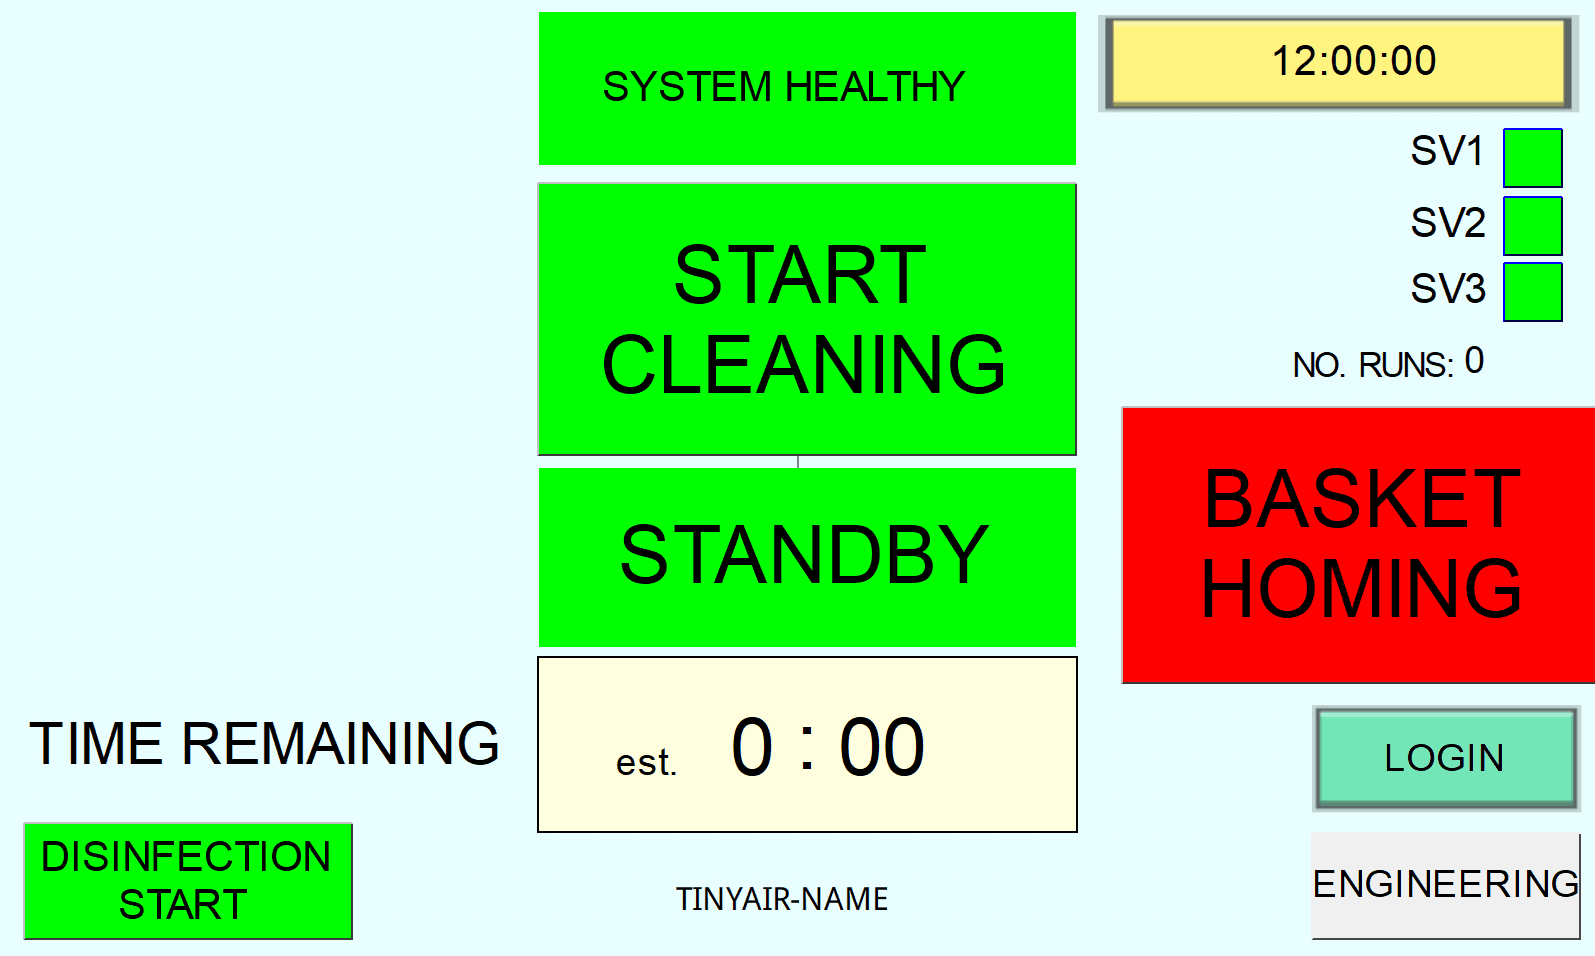
Basket Home
Press the "Basket Home" button to return the carriage to the input door.
Insert Basket
Slide the loaded DIN basket into the carriage until you feel it drop slightly into the locating lip.
Starting the Cleaning Cycle
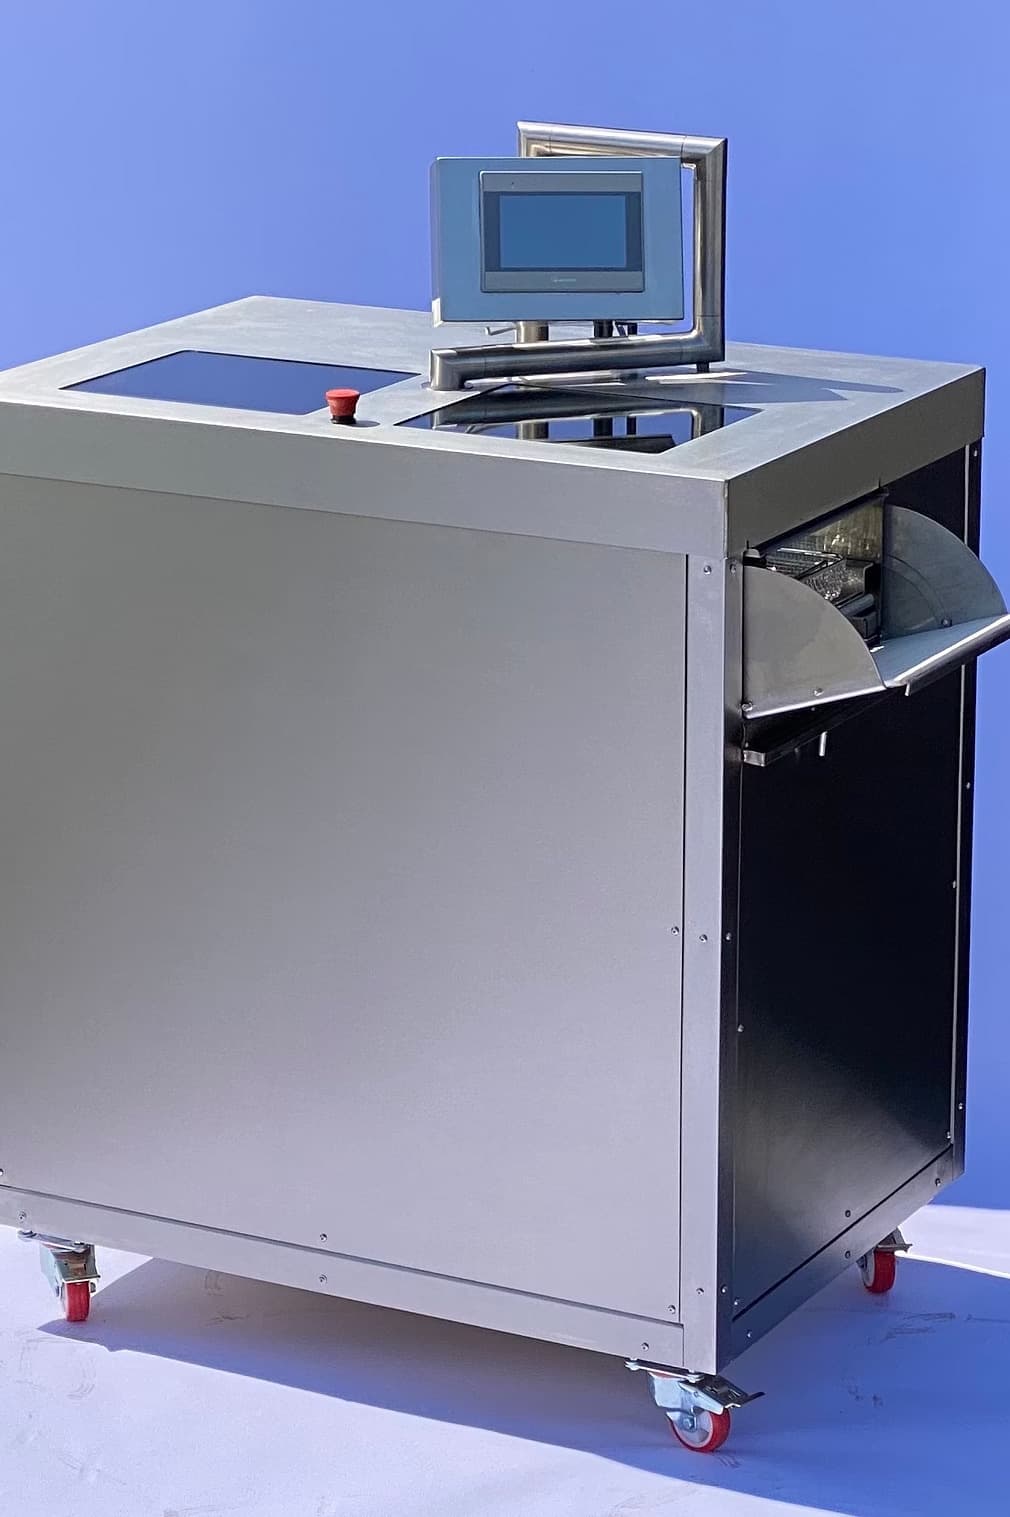
Touchscreen Interface
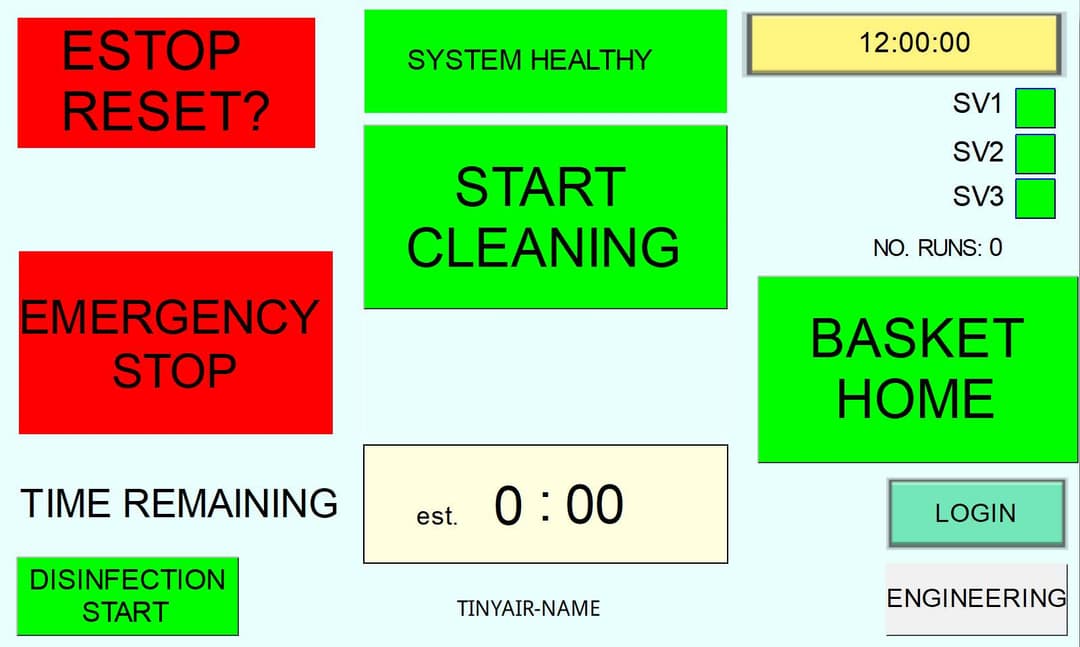
With the instruments loaded, press the "Start Cleaning" button once on the touchscreen to begin the cycle. The home screen provides the user with key information:
- System State box – Must show "System Healthy". Issues shown in red.
- Start Cleaning button – Touch to start and stop the cycle.
- Mode box – Shows standby, cleaning, venting etc.
- Timer – Countdown of time remaining.
- Disinfection Start button – Start/stop a disinfection cycle.
- Solenoid Valve Indicators – SV1, 2, 3 show active nozzle set.
- Basket Home button – Moves basket to inlet door.
- Login button – Access maintenance interface.
Cycle Running
The cleaning cycle runs for 2 minutes. The information box will show "Cleaning". The red "Stop Cleaning" button will be visible throughout the cycle. If there are any issues, press "Stop Cleaning" — the system will vent aerosols and the doors will open.
Post-Cycle Handling
Venting
Once the cycle ends, the doors will automatically crack slightly open for a few seconds while the machine extracts aerosols from the wash cabinet through an H13 HEPA filter. The doors will automatically open as the venting concludes.
Cycle Complete
The cycle is complete when the green "Start Cleaning" button shows on the touch screen and the doors are open. The basket will be at the opposite (exit) end of the machine ready to be unloaded (unless the machine is pre-configured to operate in a corner with a single door).
Unload Instruments
Carefully lift the end of the basket slightly to clear the lip, and slide the basket out. Instruments should be visibly clean.
Check Wash Cabinet
Check inside the wash cabinet for any instruments. If a lid has not been used, it is possible that lighter instruments e.g. acetabular reamers can be dislodged from the basket.
Repeat Pre-clean if Required
If any visible contamination remains, put the set back onto the carriage via the exit door and select "Start Cleaning" to run a second 2-minute cycle (there is no need to select Basket Home).
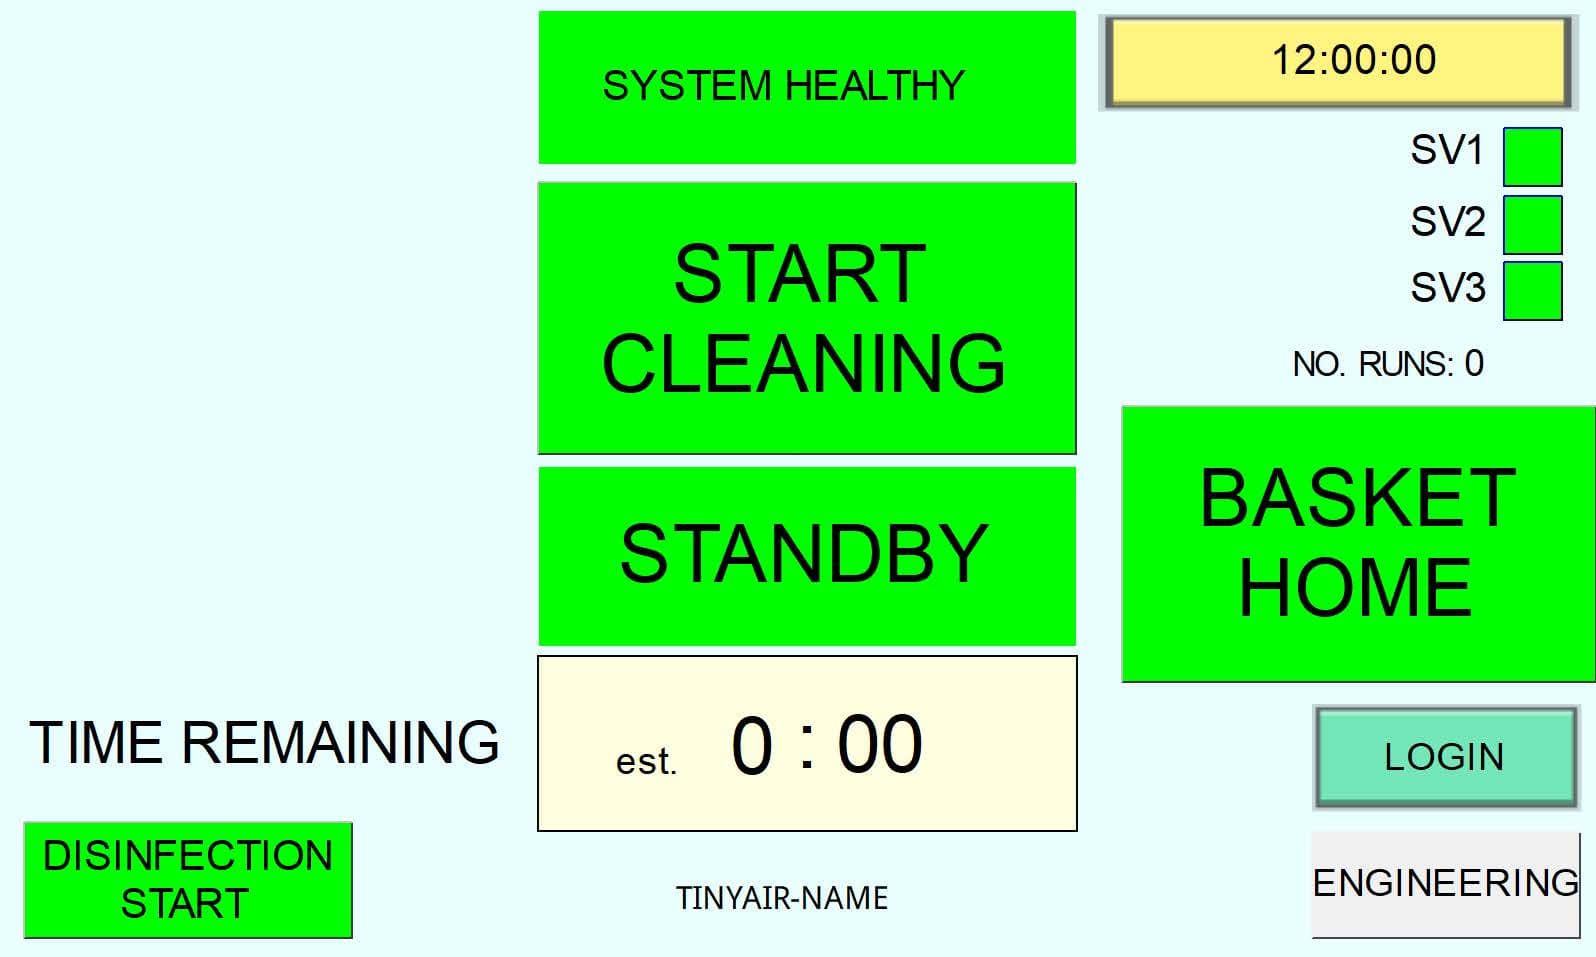
Daily Maintenance
Auto Disinfection
Run the automatic disinfection cycle once a day. The disinfection uses hot water (80°C+ for 10 minutes) to disinfect the inside of the wash chamber and drain. The cycle takes approx. 35 minutes contingent on the ambient temperature of the cabinet and water supply at the start of the cycle.
Wash Cabinet Strainers
Remove and manually clean the wash cabinet strainers.
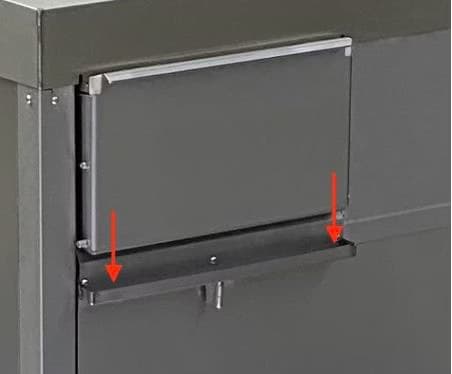
Door Drip Trays and Bottles
Wipe clean the drip trays below the doors, empty and clean the drip tray bottles.
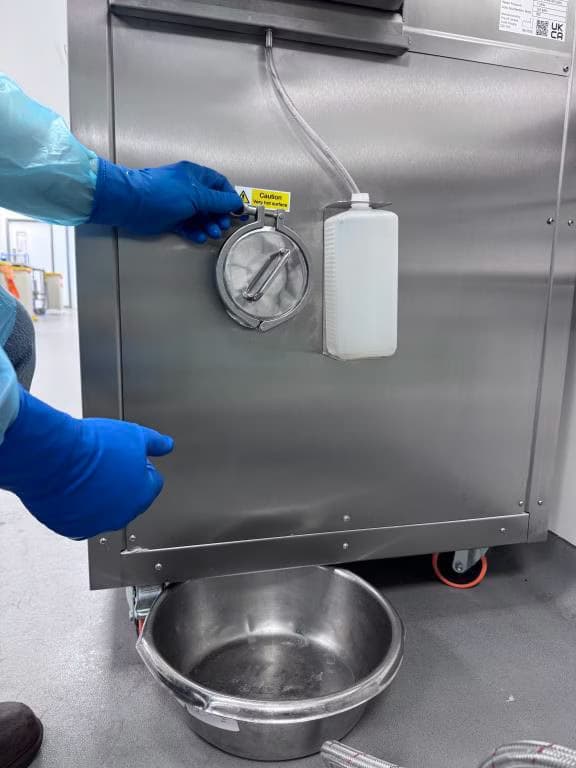
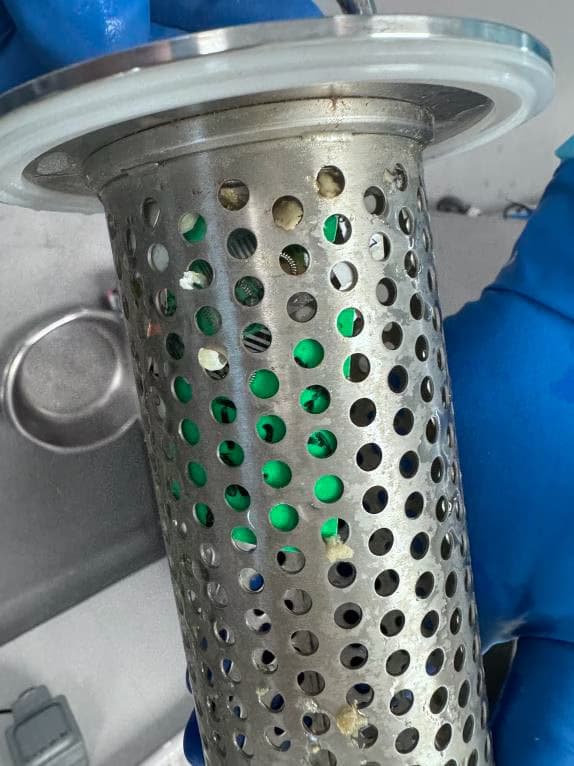
Drain Filter
Before removing the drain filter, run the auto disinfection cycle. Place a bowl under the drain filter at the right-hand end of the machine to catch any drips. Remove the circular clamp that holds the drain filter in place and remove. Clean the drain filter manually. The filter can be unscrewed allowing full disassembly for complete cleaning.
Safety Features
Emergency Stop Button
A physical red e-stop button is positioned front and centre of the machine and can be manually activated if any issue arises. This button can be reset by turning it clockwise until it pops up.
E-Stop Faults
The system is set up to automatically e-stop the machine should any safety sensors be out of range. The cause of the e-stop will be shown in the system state box at the top of the touch screen.
E-Stop Reset
The touch screen offers an E-Stop Reset button. The reset will only work once the issue indicated has been resolved.
Doors
The motors that open and close the doors use low torque to prevent injury. The torque is increased only when the doors are closed to seal them firmly shut. The cycle will not run if the doors are not shut.
Anti-Flood
There are float switches in the base of the machine which, if activated due to a leak, will e-stop the machine and cut the inlet water supply. In the event of a leak, turn off the power and water supply immediately, and contact the supplier.
Carriage Coupling
The magnetic carriage coupling is designed to release should any devices or the basket get stuck as it moves. This prevents damage to devices and the machine. If the carriage becomes uncoupled from the magnets, move it along rails until you feel it reconnects.
If the carriage is removed from the wash cabinet, ensure that the magnetic coupling is facing towards the rear of the machine when it is replaced and reconnected with the magnetic drive.
Engineering Login
⚠ The following instructions are intended for use by a Competent Person Decontamination, Decontamination Technician or an Authorised Engineer Decontamination. These processes and procedures should not be attempted by an unqualified person.
Login Procedure
To login to the engineering back end of the HMI, select the green LOGIN button at the bottom right hand of the touch screen. Tap in the User Name and Password boxes to bring up the on-screen keyboard.
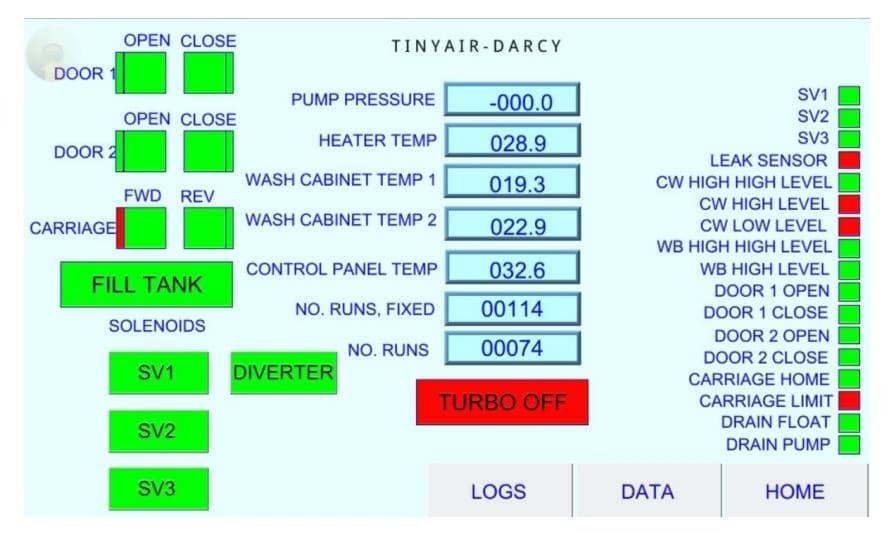
Engineering Screen
This screen allows technicians to watch the cycle data for repair, servicing and validation purposes.
Training
Ensure all users are trained to follow these Instructions for Use.
Emergency Procedures
Fire / Smoke
- Do not place yourself or any other person in danger.
- Call 999.
- If possible, switch the power supply and water supply off at the wall.
- If possible, use a CO₂ extinguisher.
- Instruct fire trained personnel that the lid of the unit will lift off to provide access.
Water Leak
- Isolate water supply and electricity at wall.
- Contact Tiny Air.